Sunday, May 16, 2010
Bleh
A recent power outage then a move has taken quite a toll on not only the tank, but the inhabitants as well. Out of a total of 24 fish, there are 9 left due to the power outage. The plants themselves are desperately recovering after the 4 days of no light or fertilization, hair grass has nearly completely died on the right side and has signifcantly thinned out in general. After a new move and getting back on schedule, as well as a heavy trim, its growing back.. albeit slowly. Feels like I'm starting over from the beginning, but it could be worse. Pictures will soon follow.
Monday, April 5, 2010
Ack! Hacked apart!
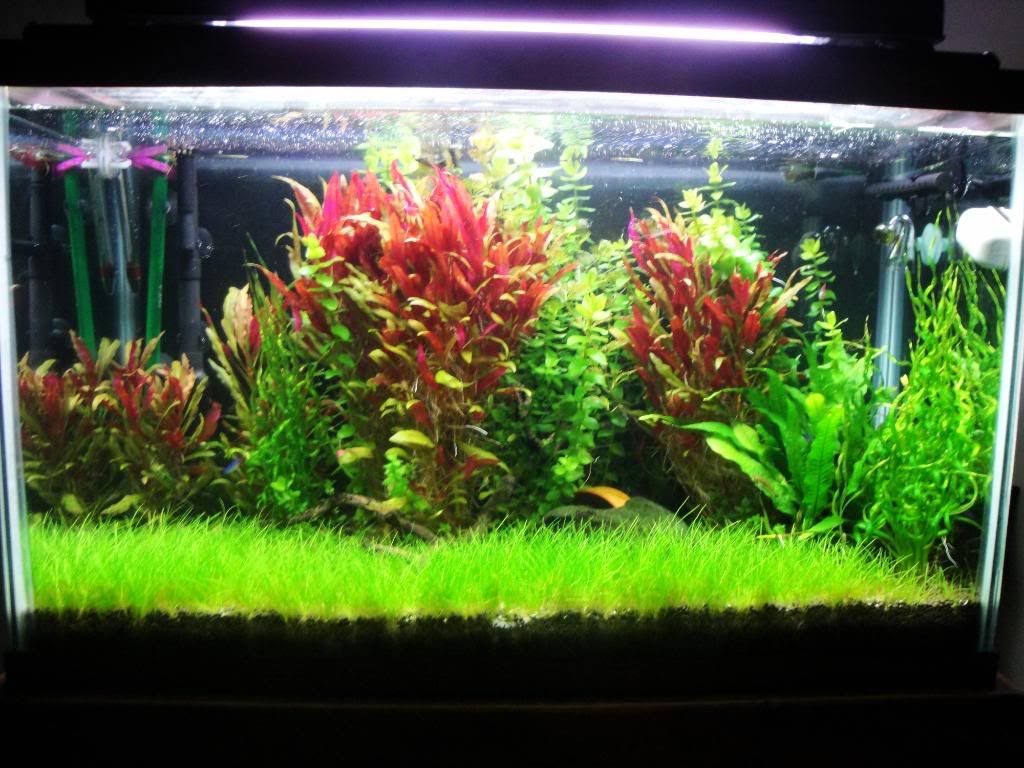
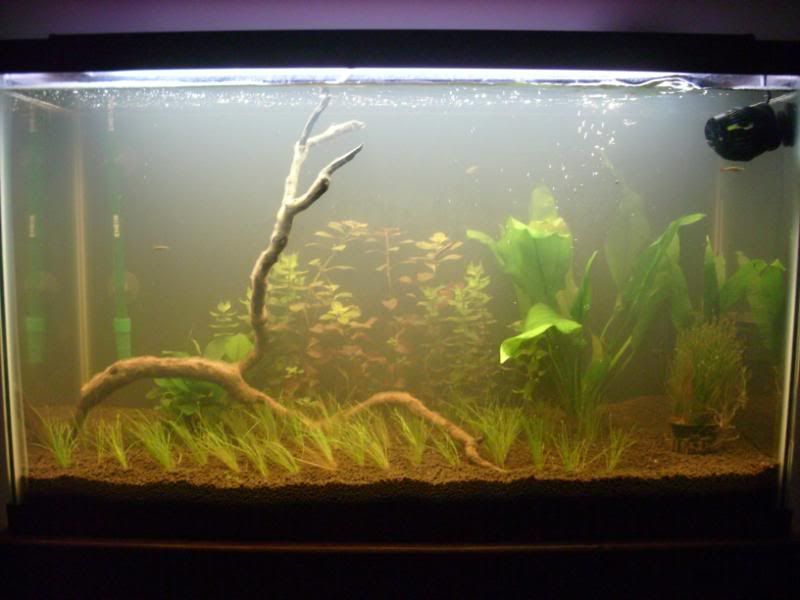
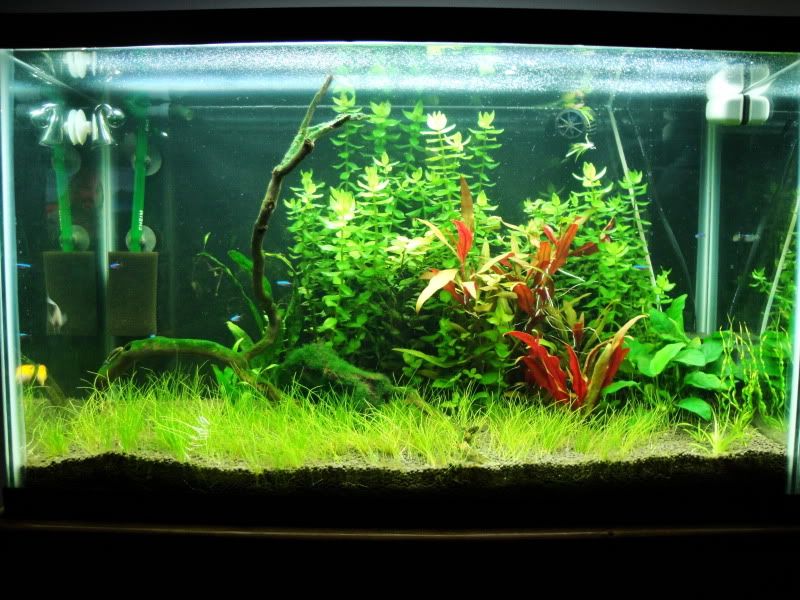
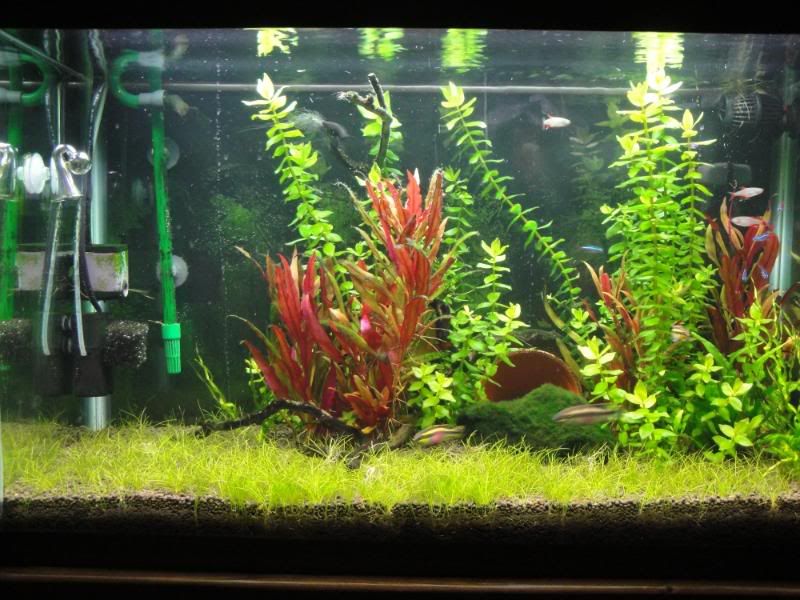
So, the tank looked like this on April 1st, 2010:
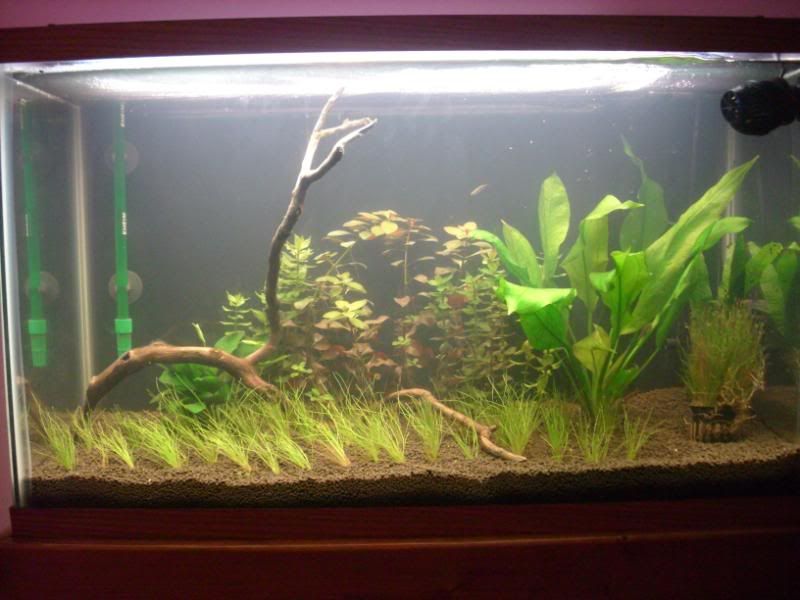
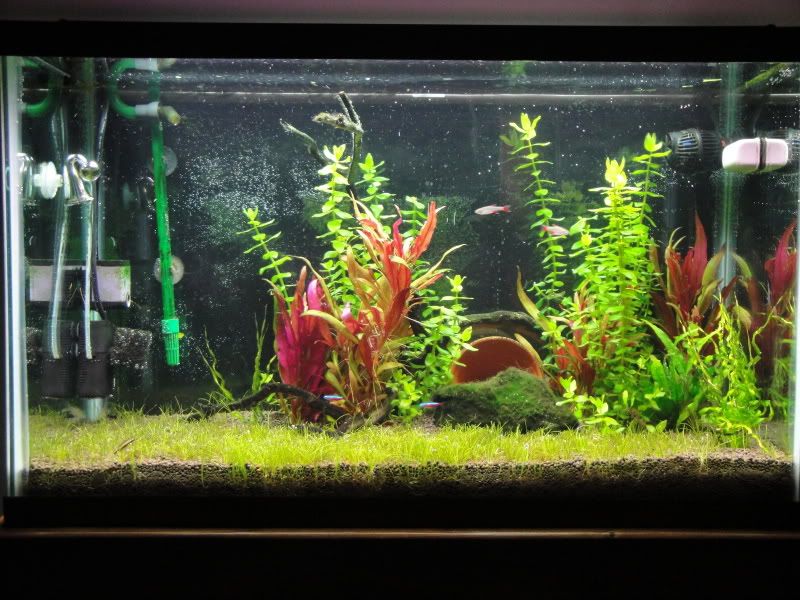
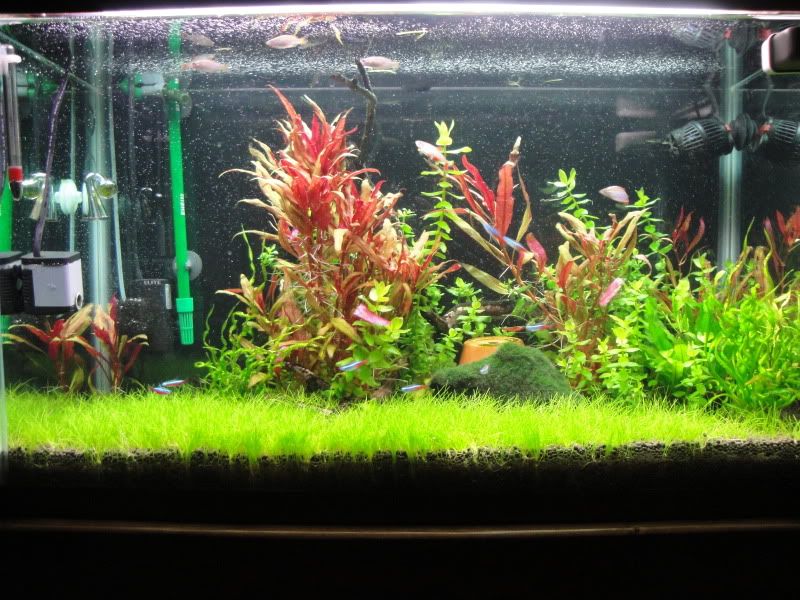
It now looks like this as of April 5th, 2010:
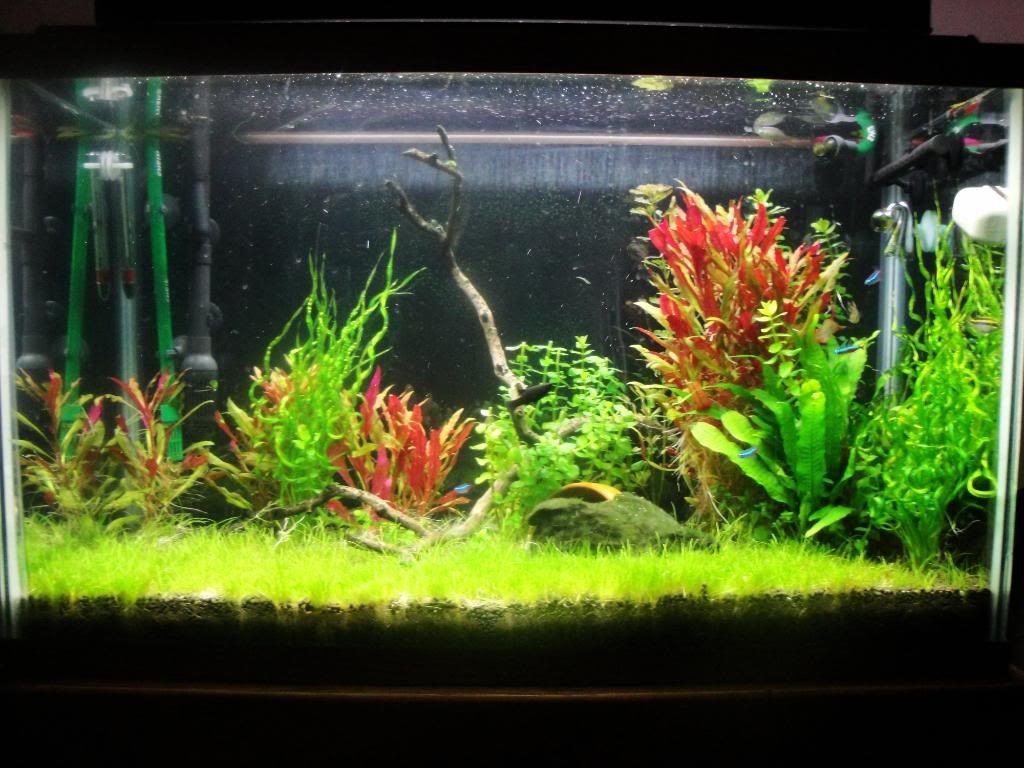
Now you might ask, WHY?! Well, the Alternanthera reineckii 'rosaefolia looked great at the top, but at the bottom the leaves had all fallen off due to lack of light, it was so bushy it had been blocking light to alot of the surrounding plants as well. In all truth I'd like to do a total rescape, however the money isn't there for new plants. We'll just have to wait for the future, until, I'll let it grow in as it is.
Sunday, April 4, 2010
Moving, onto the new.
So I moved across a few different state lines, had to leave the old tanks behind and all I was able to salvage was the major equipment (lights, filter, fertilizers and a few chemicals here and there). Lucky for me, eventually the wife was able to buy me a Marineland 29 gallon tank with a beautiful oak stand
 . Previously, for Christmas, she had also bought me a gift certificate to Dr. Fosters & Smith, which I decided that I would use to buy an Eheim ECCO 2234
 canister filter. This would be the first canister filter I ever owned, and was one of the best decisions I made to date. Still, I was no where near ready to begin starting this tank. I had a general idea of how I wanted it to turn out and the supplies I wanted to buy, but I won't lie, this hobby can be expensive if you let it. To keep a very long story short, it took me quite a few months to come up with the money to buy the things I wanted, so I'll list the things I knew I wanted and eventually bought.
- ADA Amazonia I Planted Tank Substrate
- Live plants
- A decent T5 Lighting system (Eventually I bought two Coralife Double Strip T5 fixtures)
- Powder form fertilizers
- Pressurized Co2 System
The ADA Amazonia substrate alone was nearly $90. It's a clay based soil substrate rich in nutrients instead of your typical "gravel" that you would have for your aquarium. It's especially tailored for use in a tank with live plants. This was purchased from http://www.adgshop.com/. The plants I bought at first came from http://www.aquariumplants.com, the plants I bought where two bunches of Ludwigia Repens, Java Fern, Anubias Nana 'Petite', Bacopa Carolinia, an Amazon Sword and two pots worth of Dwarf Hairgrass. Everything came packed extremely well and looked great, I had filled the tank with water about 5 days prior and immediately began planting when I received the plants. One thing to note however, if anyone that does read this decideds to go the ADA Amazonia route, DO except a heavy ammonia spike for the first week or so as well as cloudiness, this IS normal, so don't plan on adding in fish or invertebrates until the tank cycle is fully complete.
Not much to look at, I know.. but it takes time. This hobby is definitely one that requires PATIENCE. Most of the plants are very easy to plant, put the roots in the soil, cover them up without stirring it up too much and let it be. The Dwarf Hairgrass on the other hand is a COMPLETELY different story. It generally comes in to pots, like you see in the tank to the right, but it's grown in a bio-degradable foam. I had to cut the pot completely off and avoid damaging the roots that had grown outward, then I needed to gingerly remove the foam from around the roots, not an easy process to say the least. Finally, to achieve a proper carpet, like I had intended, you need to easily seperate the blades from each other and plug them in the soil with a pair of tweezers or something similar.
From here, i'll post the pictures that were taken to show plant growth progress among other things.

No picture had been taken after this point up until yesterday, April 3, 2010. Through most of the first few months, I dealt with constant algae outbreaks, BBA, Blue Green Algae, Hair Algae, you name it, I had it. The key is dialing in your Co2 so that you have the maximum amount of Co2 present in the water without killing your fish and proper fertilizer dosing to go along with the amount of light you have over the top of the tank. Following the EI method of fertilization. This is a method of fertilization that basicly means OVER dosing the tank with fertilizer, but performing a 50% water change WEEKLY so that levels return to normal, that way there will never be a nutrient deficiency. Learn more by googling Estimative Index fertlizing or the EI Method of fertilization.
I obtain my fertilizers from http://www.aquariumfertilizer.com/ and I personally use Potassium Nitrate, Mono Potassium Phosphate, Potassium Sulfate and Plantex CSM+B for iron and trace minerals. Dosing at 1/8th of a tsp of NPK and CSM+B 3x a week each alternating days, with no fertilization on Saturdays and the 50% water change on Sundays or late Saturday nights.
This will be the end of the "story" of how this tank came to be, from here on out this blog will be based upon current tank progress as well as other unique stories, comments or other useful information for the hobbyist abroad.
If you'd like to see the full story of how this tank really came along, you can check out my tank's journal over at The Planted Tank, a wonderful community of fellow hobbyists that are absolutely great and more than willing to help the beginner and the experienced alike. Search for me here if you'd like under the username snoz0r. I'd be more than willing to help anyone I can.
A couple of websites that I recommend visiting for information, equipment or other things in the hobby are below, some previously mentioned.
The Planted Tank
Green Leaf Aquariums (Orlando's Company, a member from The Planted Tank, a GREAT guy, very helpful and sells QUALITY supplies)
AquariumFertilizer.com (Fertilizers)
AquariumPlants.com (live plants)
Big Al's Online (supplies, equipment, etc)
- ADA Amazonia I Planted Tank Substrate
- Live plants
- A decent T5 Lighting system (Eventually I bought two Coralife Double Strip T5 fixtures)
- Powder form fertilizers
- Pressurized Co2 System
The ADA Amazonia substrate alone was nearly $90. It's a clay based soil substrate rich in nutrients instead of your typical "gravel" that you would have for your aquarium. It's especially tailored for use in a tank with live plants. This was purchased from http://www.adgshop.com/. The plants I bought at first came from http://www.aquariumplants.com, the plants I bought where two bunches of Ludwigia Repens, Java Fern, Anubias Nana 'Petite', Bacopa Carolinia, an Amazon Sword and two pots worth of Dwarf Hairgrass. Everything came packed extremely well and looked great, I had filled the tank with water about 5 days prior and immediately began planting when I received the plants. One thing to note however, if anyone that does read this decideds to go the ADA Amazonia route, DO except a heavy ammonia spike for the first week or so as well as cloudiness, this IS normal, so don't plan on adding in fish or invertebrates until the tank cycle is fully complete.
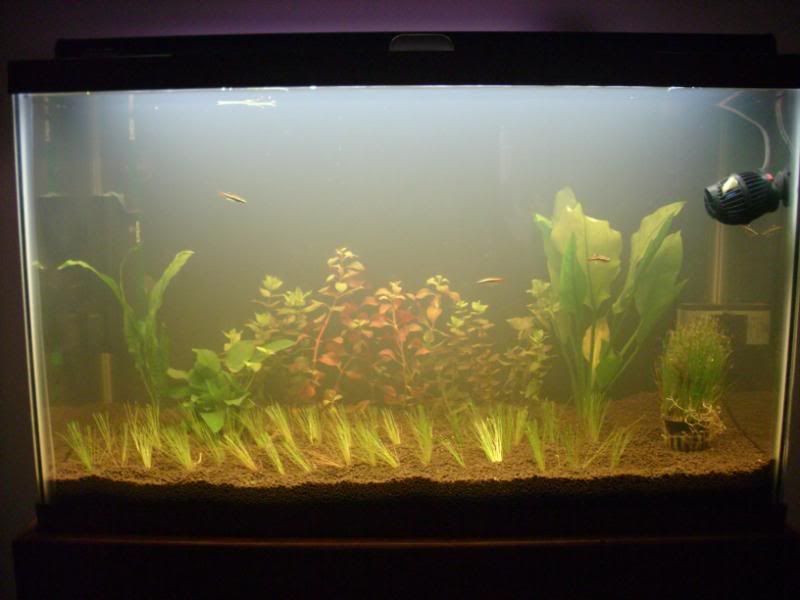
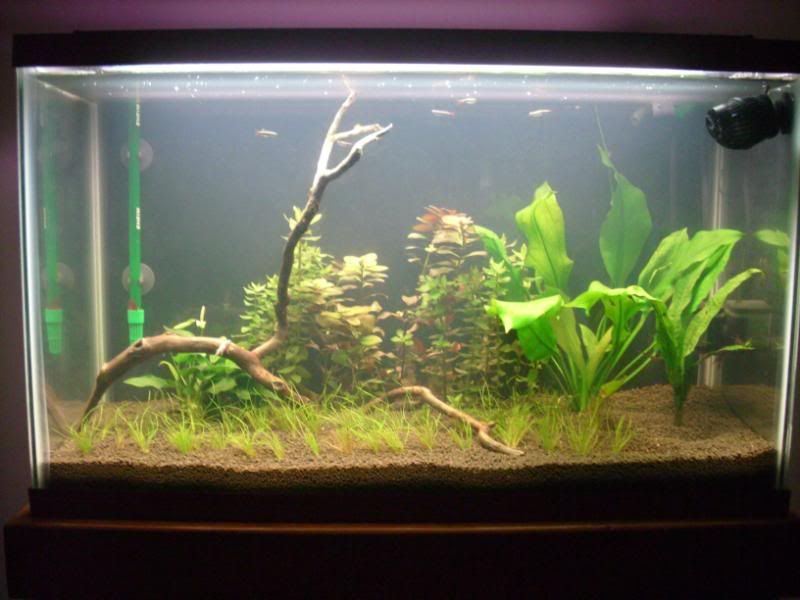
This is what it looked like immediately after setting it up (5-09-09 and planted with the new lights (the fish were White Cloud Mountain Minnows). The Red Sea Co2 Generator was in use as well from the previous tank:
Not much to look at, I know.. but it takes time. This hobby is definitely one that requires PATIENCE. Most of the plants are very easy to plant, put the roots in the soil, cover them up without stirring it up too much and let it be. The Dwarf Hairgrass on the other hand is a COMPLETELY different story. It generally comes in to pots, like you see in the tank to the right, but it's grown in a bio-degradable foam. I had to cut the pot completely off and avoid damaging the roots that had grown outward, then I needed to gingerly remove the foam from around the roots, not an easy process to say the least. Finally, to achieve a proper carpet, like I had intended, you need to easily seperate the blades from each other and plug them in the soil with a pair of tweezers or something similar.
From here, i'll post the pictures that were taken to show plant growth progress among other things.
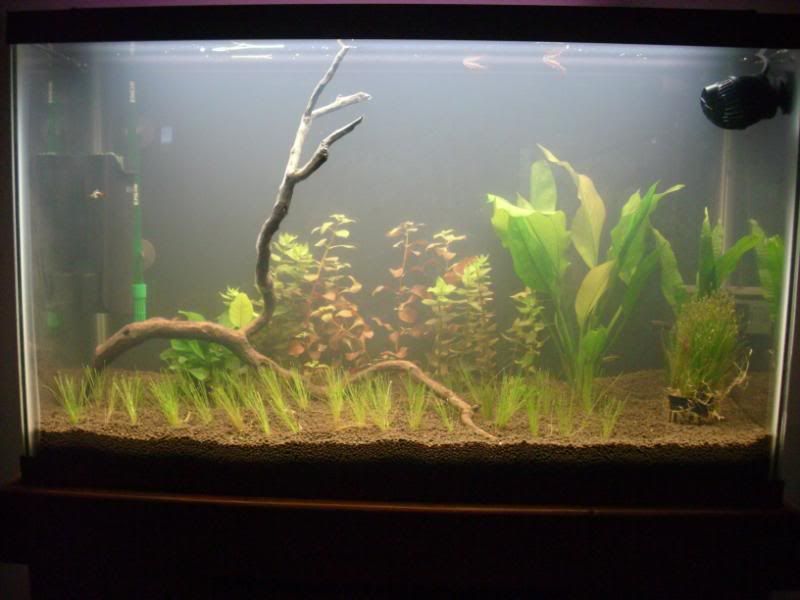
5-12-09:
5-17-09 (as you can see, the amazon sword is beginning to melt/yellow due to lack of nutrients and Co2):
5-21-09:
5-28-09:
6-23-09: (The amazon sword basicly died off, as did the Ludwigia Repens.)
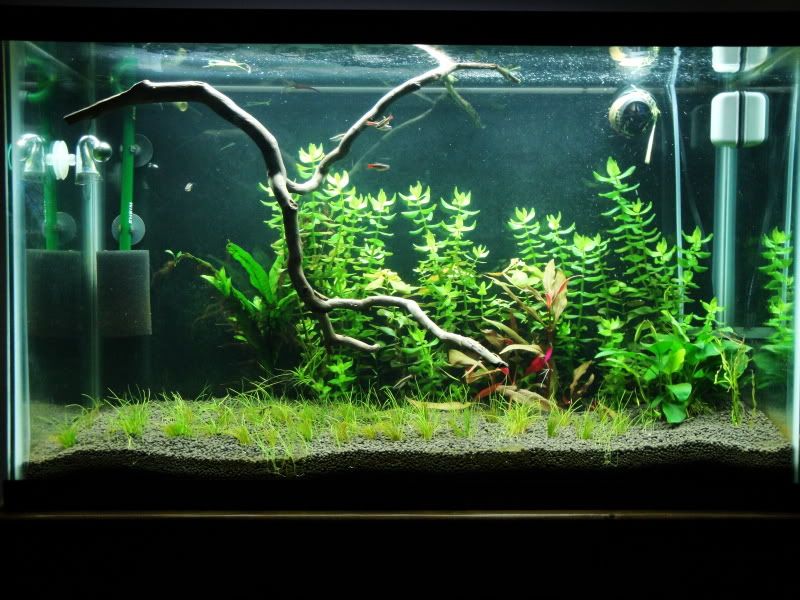
7-29-09: (An EXPLOSION of growth within a month, the Dwarf Hairgrass really took over. The red plant you see is Alternanthera reineckii 'rosaefolia. If you look hard and to the right, you'll notice a spiral looking plant which is Echinodorus 'vesuvius' (Echinodorus Angustifolia).
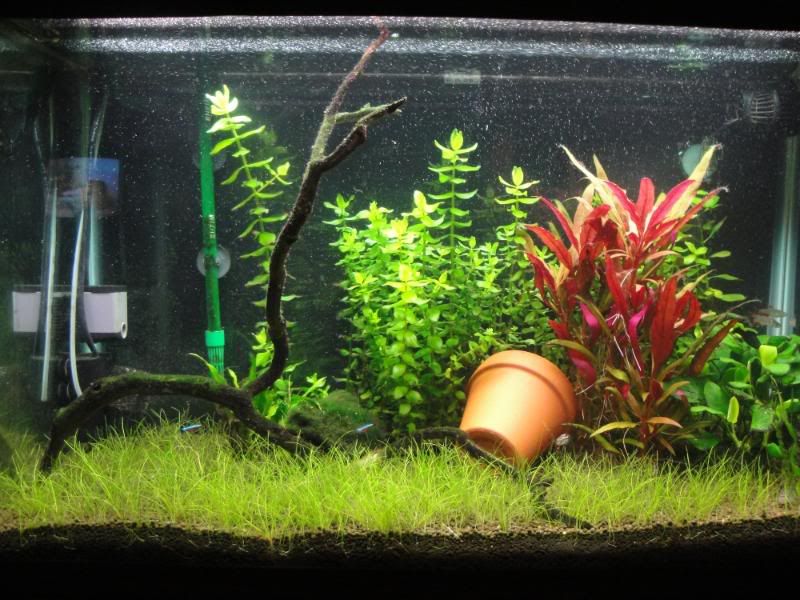
9-24-09: (Kribenis cichlids were bought, the clay pot is meant for a "cave" for them to hide". Unsightly, I know). A pressurized Co2 cylinder was purchased at this point as was being diffused through a Hagen Mini Elite.
9-27-09: (Did a MAJOR trim, hacked most of the plants away)
11-02-09:
11-11-09:
1-7-09: (Finally, nearly a full Dwarf Hairgrass carpet)
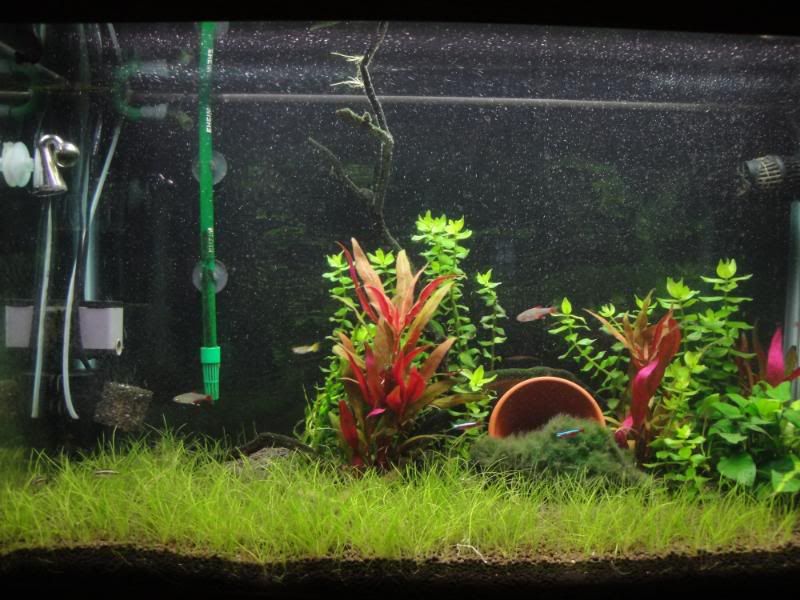
1-19-09: (Another trim was done, clay pot was hidden significantly)
1-30-09:
I obtain my fertilizers from http://www.aquariumfertilizer.com/ and I personally use Potassium Nitrate, Mono Potassium Phosphate, Potassium Sulfate and Plantex CSM+B for iron and trace minerals. Dosing at 1/8th of a tsp of NPK and CSM+B 3x a week each alternating days, with no fertilization on Saturdays and the 50% water change on Sundays or late Saturday nights.
This will be the end of the "story" of how this tank came to be, from here on out this blog will be based upon current tank progress as well as other unique stories, comments or other useful information for the hobbyist abroad.
If you'd like to see the full story of how this tank really came along, you can check out my tank's journal over at The Planted Tank, a wonderful community of fellow hobbyists that are absolutely great and more than willing to help the beginner and the experienced alike. Search for me here if you'd like under the username snoz0r. I'd be more than willing to help anyone I can.
A couple of websites that I recommend visiting for information, equipment or other things in the hobby are below, some previously mentioned.
The Planted Tank
Green Leaf Aquariums (Orlando's Company, a member from The Planted Tank, a GREAT guy, very helpful and sells QUALITY supplies)
AquariumFertilizer.com (Fertilizers)
AquariumPlants.com (live plants)
Big Al's Online (supplies, equipment, etc)
Monday, March 8, 2010
Lighting and Further On
We last left off where I discovered I needed more light for my plants, I had found another aquarium light
 downstairs and put it on top of the tank, hoping this would solve my problems. Since I had figured at the time everything was going to be fine from here on out, I went to the pet store the next day and ended up buying some more plants to try and fill in the tank. All along I had figured if I just plopped them in there and left them alone, eventually they would turn out to look just like one of the great tanks
 I had been seeing all over Google and different message boards. So here I was with my 6 stems of Anacharis, the Purple Waffle which was bound to die (didn't know this yet), a Java Fern and another 6 stems of Ludwigia Repens.
At the time I thought it looked beautiful and as much I've scoured old message boards and computers, for the life of me I can't find any pictures, but I assure you.. it looked terrible. Again after a few days, things started to go awry. I started getting some algae on the plants and decorations due to the extra light
 being left on, as I hadn't yet discovered the idea of proper light
 TIMING
 . This is very important for those new to planted aquariums. I promise you, leaving your lights
 on for more then 12 hours a day is in no way beneficial to your plants at all. Not unless your a huge fan of different forms of algal plant mass anyway ;). With that being said, as I had mentioned, things weren't looking very well, so back to the drawing board (internet) I was again trying to discover what my problem was. Honestly I didn't find an answer at all for atleast a few days, turns out I wasn't really looking in the right places.
What I did eventually find was that my tank was considered "lightly" planted and it was low tech at the time. Low-tech was considered lower light (1 - 1.5 watt per gallon range) with no Co2
 supplementation. Co2? As in carbon dioxide
 ? How in the world was I going to implement that in a aquarium? The thought completely dumbfounded me until I had read further about DIY (Do It Yourself) Co2 implementation and diffusion
 . DIY Co2 is a fairly decent method for a low-tech tank like mine, so I needed to find a way to do that. I also learned that my plants would likely benefit from a more nutrient rich substrate
 and even could be enhanced even further with water column fertilizer
 dosing. At that moment it all dawned on me.
This whole time I had been trying to get plants to survive underwater, but I never stopped for a second to think about how normal terrestrial plants grow. They need good soil, nutrients , good light and through photosynthesis they absorb carbon in the form of carbon dioxide and release oxygen in the process. Why would aquatic plants be any different? Suddenly, my family "present" became something more than that. I saw unlimited possibilities in my mind for what could be done, it was just a matter of whether or not I had the time and budget to follow through. Turns out I had a little bit of both. I immediately hopped online and discovered how to build your own Co2 generator, using 2 liter bottles, yeast and sugar. I went a little bit of a different route however and bought the Red Sea Bio Generator, a commercial product that came with it's own venturi powerhead pump for the diffusion method. It's a little more costly than making your own, but I had a little extra cash and it made it just a little easier. If you do consider buying the Red Sea Bio Generator for yourself, they do have refill packs
 that you can buy for ease, however it's CONSIDERLY cheaper to make your own. A recipe for the mixture will be at the bottom of this post. Also when I bought the co2 generator I had bought a set of SeaChem Liquid Fertilizers and a bottle of SeaChem Excel
 for an extra carbon source. I received in the mail, set everything up per instructions and dosed regularly as the instructions on the bottle told me too.
Everything really started to come together after all this, the plants were growing, albeit slowly. Eventually after about or month or so, I was able to save up enough cash to buy some new substrate (gravel/soil). At the time, the only thing available to me locally was Flourite. Flourite
 is a hard clay mixture with a particularly high iron content which would be good for plant root development. I purchased enough for my tank
 , immediately went home and tediously replaced the gravel in the tank with the Flourite
 after rinsing it for nearly 3 hours in a bucket
 until the water ran clear. If you skip this step, you'll be in for some EXTREMELY muddy water for I couldn't even imagine how long. Even after I rinsed mine out till it was clear, the tank
 still was murky for atleast 24 hours or so, but eventually cleared out after a water change. It did take some time for the plants to adjust after having to replant everything and trimming, but they did eventually fill in fairly nicely over time. For about 3 months I kept trimming the plants, and replanting here and there. It started to look half-way decent for what it was.
After that, I ended up moving across states here to Indiana, space was just completely unavailable for my tank or the 55 gallon I had upstairs that housed a set of Golden Geckos. All fish, geckos and anything I could manage except equipment was sold, given to friends, or donated to the pet store. I wasn't very happy with having to leave it all behind, but it had to be done...
At the time I thought it looked beautiful and as much I've scoured old message boards and computers, for the life of me I can't find any pictures, but I assure you.. it looked terrible. Again after a few days, things started to go awry. I started getting some algae on the plants and decorations
What I did eventually find was that my tank
This whole time I had been trying to get plants to survive underwater, but I never stopped for a second to think about how normal terrestrial plants grow. They need good soil
Everything really started to come together after all this, the plants were growing, albeit slowly. Eventually after about or month or so, I was able to save up enough cash to buy some new substrate
After that, I ended up moving across states here to Indiana, space was just completely unavailable for my tank
DIY Co2 Recipe + Equipment
You will need the following items:
- 1 2-liter soda bottle, empty and rinsed out of course ;)
- 1 cup sugar
- 1 tsp bakers yeast/brewers yeast
- Fresh Warm Water (not from the aquarium)
- CO2 Proof Tubing /Airline Tubing
- A small amount of silicone sealant , to seal the tubing and bottle
- Fresh Warm Water (not from the aquarium)
- CO2 Proof Tubing
- A small amount of silicone sealant
Here's what you need to do:
- Drill a hole in the soda cap large enough so the tubing will fit snuggly.
- Push the tubing through the soda cap so it sticks out maybe 1/2 inch through the bottom of the cap.
- Seal around the tube on the top and bottom of the soda cap with the silicone, then allow it to dry and try to see if it's air tight.
Once that is done and finished, it's time to mix the ingredients:
- Add the sugar to the bottle.
- Add the yeast.
- Add the water to the bottle, only add till the top 4 inches or so empty as this room is needed to produce the Co2 and prevent the mixture from entering your tank.
- Cap the bottle and put the other end of the tubing into whatever method your using for diffusion (even a fine mist airstone).
The Co2 should start bubbling out within a 5 to 24 hours, but I promise it will come. The mixture will last about 2 weeks or so, and then you'll have to make the sugar/water/yeast mixture again. There are other ways of Co2 diffusion, being high-tech with actual cylinder and reactors, but that will be talked about another day once I get to my current tank.
There are a few other ways of building this set up, as well as different recipes as well, one even including jello. Do your research and discover what you think would be the best for you! This was just the easiest way of diffusion I could think of off hand for a complete beginner.
Subscribe to:
Posts (Atom)